Installing gutters properly is crucial for protecting your Staten Island home from water damage, foundation issues, and costly repairs. Whether you are a homeowner, property manager, or DIY enthusiast, understanding the complete process of gutter installation tailored to Staten Island’s unique climate and local building codes can ensure long-lasting results and optimal rainwater management. This guide walks you through every essential step, tools involved, material choices, local considerations, and maintenance tips for a successful gutter system installation in 2025.
Introduction to Gutter Installation in Staten Island, NY
Gutters serve as an essential component of your home’s exterior, channeling rainwater away from roofs, walls, and foundations to prevent erosion and structural damage. In Staten Island, New York, the unpredictable weather patterns—ranging from heavy rains and snowfalls to salty coastal air—make proper gutter installation even more critical.
Installing gutters in Staten Island requires awareness of local building codes, permit requirements, and environmental factors that influence material durability and system design. Professional gutter installation not only adheres to these regulations but also enhances your property's value by safeguarding against water intrusion and moisture buildup.
Understanding the full installation process empowers homeowners to either hire experienced Staten Island contractors with confidence or take on the project themselves with thorough preparation.
Overview of Gutter Types and Materials
Choosing the right gutter type and material is the first vital step in the installation process. Commonly used gutters in Staten Island include:
- Seamless Gutters: Popular for their custom fit and reduced leakage risk; fabricated on-site to match roof dimensions. Aluminum Gutters: Lightweight, corrosion-resistant, and cost-effective—ideal for Staten Island’s humid coastal environment. Copper Gutters: Durable and visually striking, though premium in price and requiring expert installation. Vinyl Gutters: Affordable and easy to install, but less durable under harsh weather conditions. Metal vs. Plastic Gutters: Metal options (aluminum, steel, copper) offer better longevity compared to plastic, which may degrade faster under UV exposure.
Residential properties often require different sizing and styles than commercial premises due to varying roof types and water flow volumes. Understanding these distinctions ensures the selected gutters accommodate Staten Island’s average rainfall without overflow or backup.

Essential Tools and Safety Measures for Gutter Installation
Before starting the installation, gathering the right tools and implementing safety precautions is crucial to avoid accidents and achieve professional-quality results.
- Tools Needed: Measuring tape, ladder with stabilizers, power drill, tin snips or hacksaw, sealant gun, chalk line, level, gutter brackets, screws, and gutter spikes or clips. Ladder Safety Tips: Always place ladders on stable, level ground. Use ladder stabilizers to protect fascia and prevent falls, and never overreach while working. Gutter Brackets & Hangers: Properly spaced (usually every 24-36 inches) to support gutter weight and resist wind or ice damage. Fastening Hardware: Corrosion-resistant screws or hidden hangers improve durability, especially in Staten Island’s salty air conditions.
Wearing gloves, eye protection, and non-slip shoes rounds out a safety-first approach while maintaining efficiency when handling metal edges and power tools.
Step-by-Step Gutter Installation Process
Following a systematic process ensures your gutters function effectively and last for years. Below is a detailed stepwise guide customized for Staten Island installations.
1. Measuring and Planning Gutter Layout
Accurate measurements of roof perimeter and downspout locations are essential. Use a measuring tape to determine lengths and map out where water needs to be directed considering existing landscape drainage or municipal guidelines.
2. Installing Fascia Boards and Gutter Brackets
Inspect the fascia boards for rot or damage since gutters attach here. Replace if necessary. Attach gutter brackets securely to fascia with the right spacing, ensuring structural support.
3. Cutting and Fitting Gutter Channels
Cut gutters to appropriate lengths using tin snips or a hacksaw. Fit sections along the roofline, ensuring clean cuts for tight seams and proper joining.
4. Joining Seams and Using Gutter Sealant
Seal joints with high-quality waterproof gutter sealant to prevent leaks. Apply generously Great site inside who fixes gutters in long island and outside seams, letting it cure as per manufacturer instructions.
5. Ensuring Correct Gutter Pitch and Slope
The gutter slope (pitch) must direct water toward downspouts with about a 1/4 inch drop per 10 feet. Use a level and chalk line to maintain this slight downward gradient for efficient water flow.
6. Attaching Downspouts and Elbows
Install downspouts at planned locations with elbows to direct water away from the foundation. Secure them tightly with straps and ensure the outlet leads to suitable drainage areas.
7. Installing Splash Blocks and Downspout Outlets
Place splash blocks at discharge points to prevent soil erosion and guide water safely away from your house.
Importance of Gutter Alignment and Pitch
Proper alignment keeps water flowing smoothly, avoiding pooling or overflow. In Staten Island’s Have a peek at this website varied rooflines and occasional strong winds, a consistent pitch minimizes ice dams and debris accumulation.
Gutter Protection and Leaf Guard Installation
To reduce clogging and maintenance frequency, consider installing gutter guards or leaf guards, especially useful in Staten Island’s leafy neighborhoods and during fall.
- Leaf Guards: Mesh or screen covers prevent leaves and large debris from entering gutters without obstructing water flow. Gutter Protection Benefits: Limits blockages that cause overflow and damage, reducing cleaning time significantly. Maintenance Reduction: While leaf guards ease upkeep, periodic checks remain necessary to remove smaller debris and inspect system integrity.
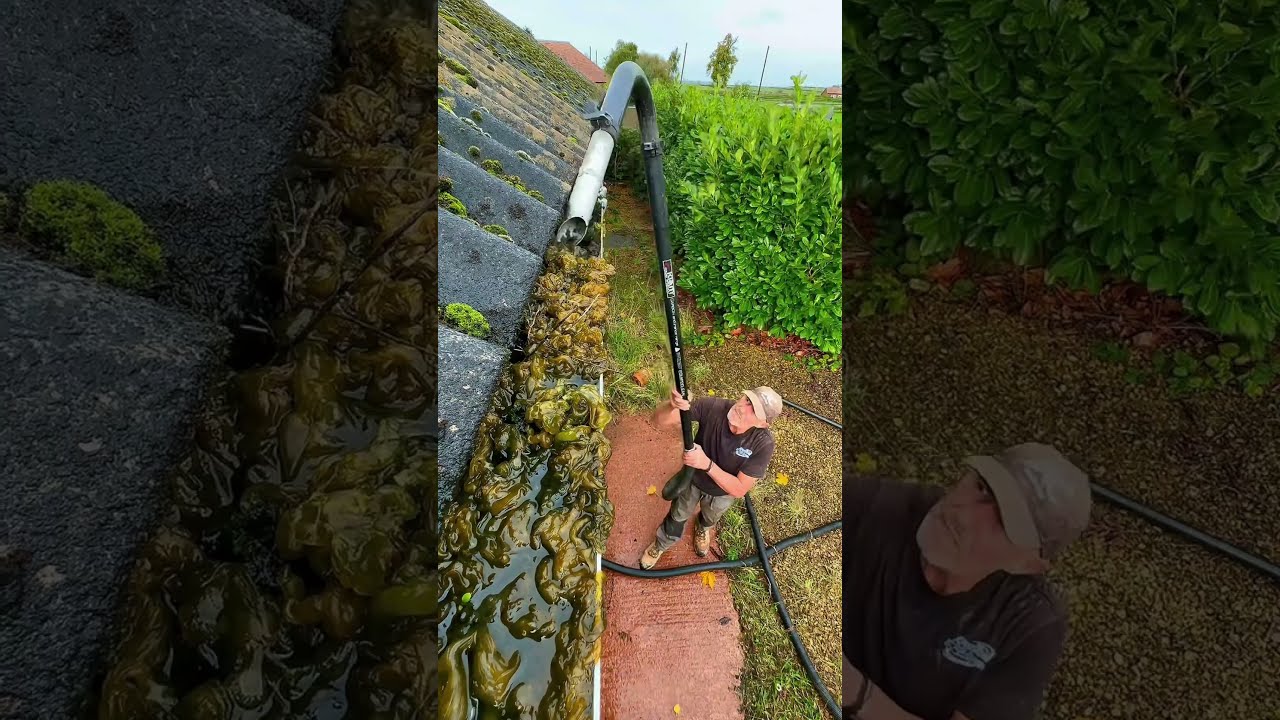
Maintenance and Inspection After Installation
Regular inspection and maintenance keep gutters performing optimally and extend their lifespan.
- Seasonal Maintenance: Clean gutters and downspouts during spring and fall to prevent buildup of leaves, twigs, and dirt. Gutter Inspection: Look for sagging, leaks, rust spots, or loose fasteners periodically, especially after storms. Repairs: Promptly patch holes and reseal joints to avoid water damage to your home. Moisture Control: Keep gutters free-flowing to prevent basement flooding and foundation erosion common in Staten Island’s moist climate.
Rainwater Management and Drainage Solutions
Effective rainwater management protects both your property https://newjersey-nj-07078-nu663.wpsuo.com/what-tools-do-gutter-cleaners-use-in-islip-ny and neighboring plots from water damage.
- Water Drainage: Gutters channel rain off your roof into designated drainage systems or rain barrels. Rainwater Harvesting: Consider integrating gutters with rainwater collection setups for irrigation or eco-friendly reuse. Water Diversion Techniques: Use downspout extensions and splash blocks to direct flow away from foundations. Gutter Capacity: Choose gutter sizes accommodating Staten Island’s typical rainfall intensity to prevent overflow during heavy storms.
Local Considerations for Staten Island Gutter Installation
Staten Island’s coastal location and municipal regulations influence the gutter installation approach.
- Weather Impact: Salt air accelerates corrosion; choosing aluminum or copper gutters with protective coatings is advisable. Building Codes & Permits: Check with Staten Island’s Department of Buildings for required permits or installation standards before starting. Material Selection: Durable, weather-resistant materials extend gutter life in Staten Island’s mix of humidity, snow, and salt spray.
Consulting with licensed Staten Island contractors ensures compliance with all local rules and access to warranty-backed materials designed for the environment.
Frequently Asked Questions
What is the typical timeline for gutter installation?
Most residential installs take one to two days depending on home size and complexity, including preparation and finish work.
How much does gutter installation cost in Staten Island, NY?
Costs vary by material, gutter length, and labor, averaging between $5 and $15 per linear foot.
What type of gutters work best for Staten Island’s climate?
Aluminum and copper gutters coated for corrosion resistance perform well under coastal weather stresses.
How often should gutters be inspected and cleaned?
Twice yearly inspections and cleanings, typically spring and fall, help maintain proper function.
Can I install gutters myself, or should I hire a professional?
While DIY is possible with adequate tools and knowledge, complex roofs and safety risks often warrant professional installation.
What are common signs gutters need repair or replacement?
Leaks, sagging sections, peeling paint, water damage near foundation, or frequent clogs indicate gutter problems.
How do gutter guards affect maintenance requirements?
They significantly reduce debris entry but still require occasional cleaning and inspection.
Are there any local permits required for gutter installation in Staten Island?
Yes, permit requirements exist; always verify with Staten Island Department of Buildings before commencing work.
Conclusion
Proper gutter installation in Staten Island, NY, combines choosing suitable materials, adhering to local codes, following a precise installation process, and maintaining the system regularly. Taking these steps protects your property from water damage, enhances curb appeal, and contributes to long-term home value. Whether you opt for professional services or https://summit-nj-07090-vc468.fotosdefrases.com/cost-of-travel-in-long-island-ny-your-ultimate-budget-guide a well-planned DIY project, staying informed about the unique environmental factors and building regulations in Staten Island will secure your investment. Ready to safeguard your home? Start planning your gutter installation today or consult a licensed Staten Island contractor for expert guidance tailored to your needs.